Creating and Reusing a 3D LUT
A stack of adjustment layers can be saved as a 3D LUT and reused for batch processing.
While editing a photo, you stack several layers to adjust the image to your taste. The layer stack can be saved as a 3D LUT and reused to quickly apply the same adjustments to other images. As an example, we create a 3D LUT applying an old style look to photos. read.. bLUe uses the standard .cube format to export and import 3D LUTs.
STEP BY STEP 3D LUT EDITING EXAMPLE
1 Open an image file and add a Channel Mixer adjustment layer.

2 Check option Monochrome and drag the control points until you obtain a pleasant black and white image. Often, the blue channel shows the highest contrast, so you should drag the control points closer to the upper vertex of the triangle.

3 Add a new layer Color Filter. Make sure the option Color Filter is checked and click the button Select Filter Color. Choose a color from the color dialog which opens and click OK.

4 Now, we will slightly reduce the highlights.
- - In the right pane select the second layer Cont/Bright/Sat
- - ChooseLayer>New Adjustment Layer>Curves HSV to add a HSV layer below Channel Mixer
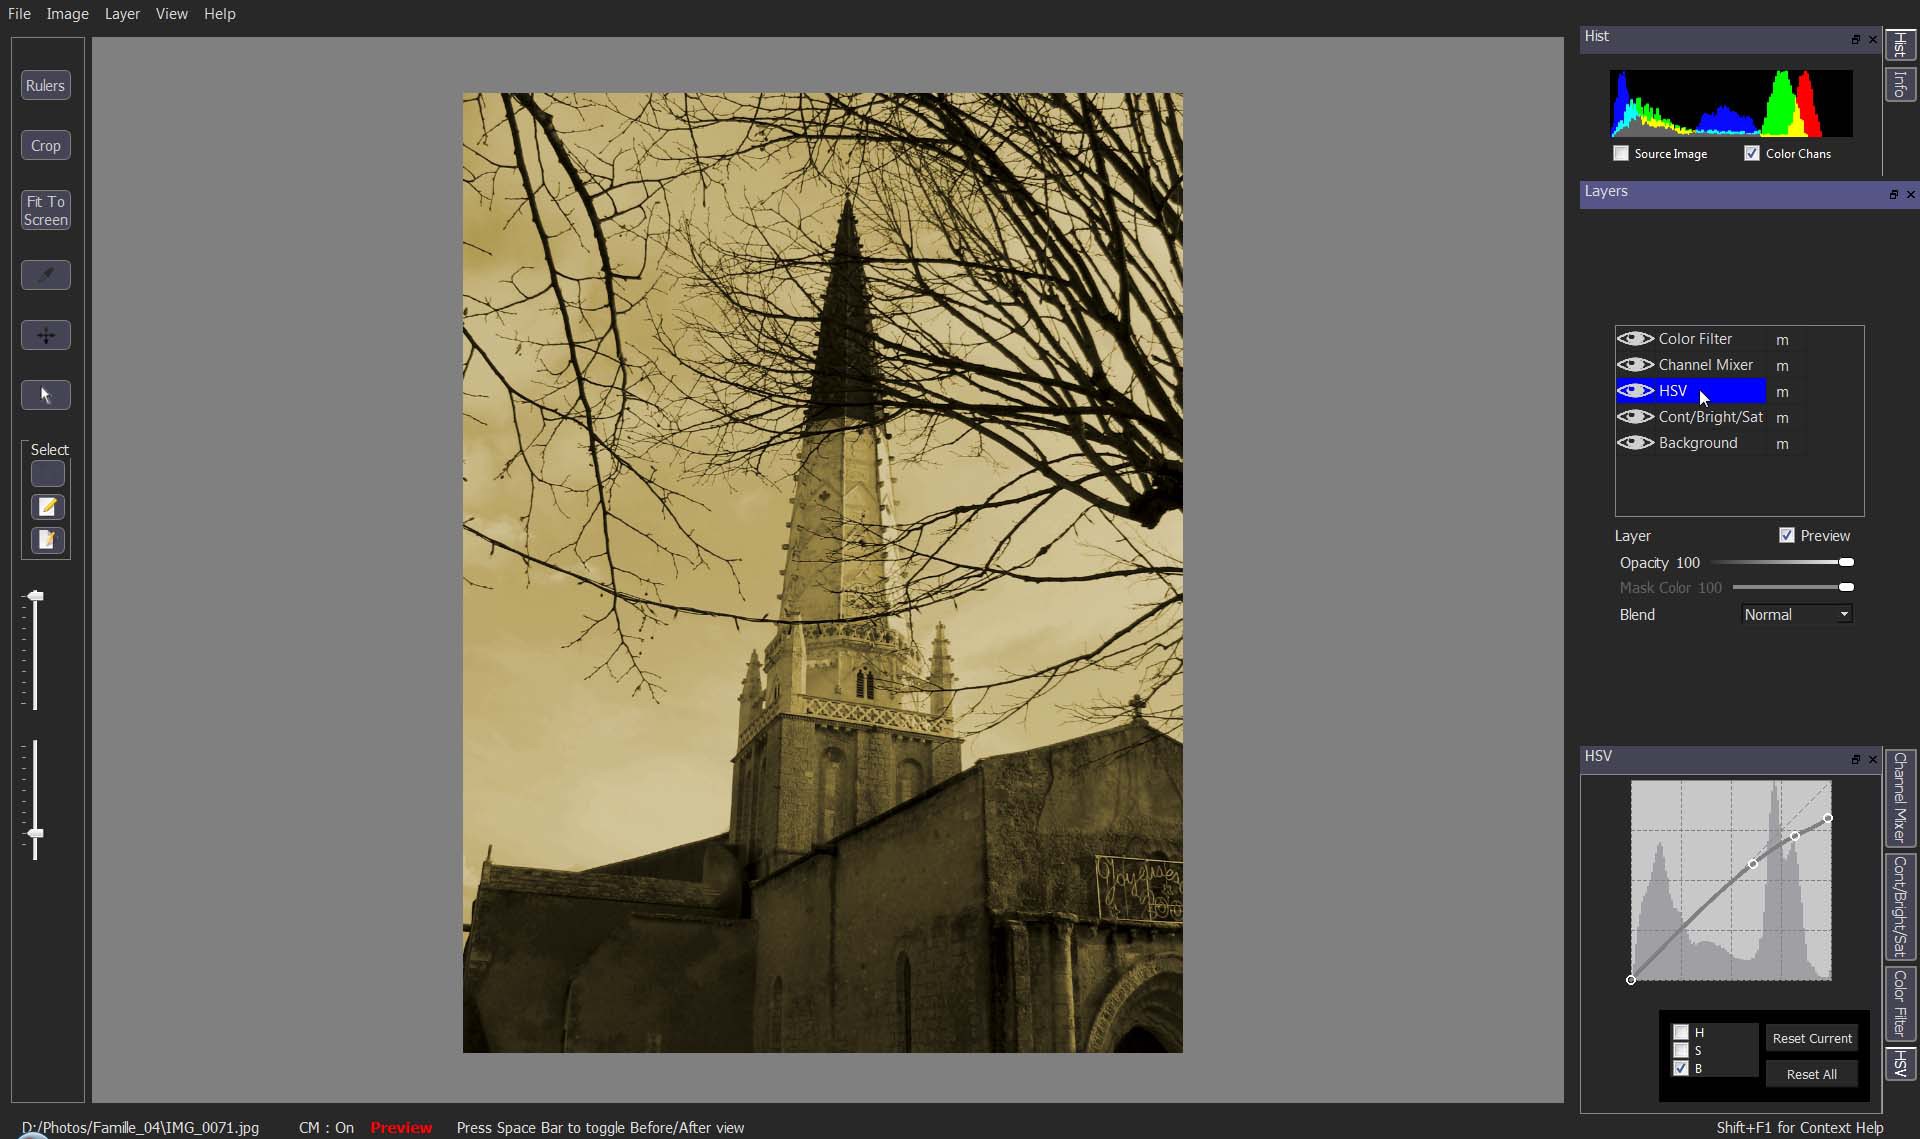
5 Check the option B of the layer form to show the brightness curve. Drag the middle control point a bit right along the curve and add a new control point by clicking on the curve. Next drag down the three upper control points to gently bend the curve.

6 Choose Layer > Save Layer Stack As 3D LUT to save the adjustments as a 3D LUT. Next, open another image, choose Layer > Load 3D LUT and reload the .cube file you saved previously.
